Hawaiian Flower Nails
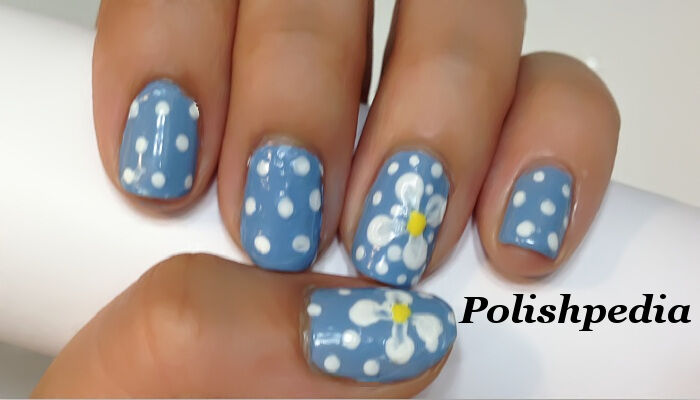
Hawaiian Flower Nails Tutorial
Hi guys! I was a little hesitant about posting this but after receiving lots of compliments on them, I decided to do a tutorial on this nail design :)
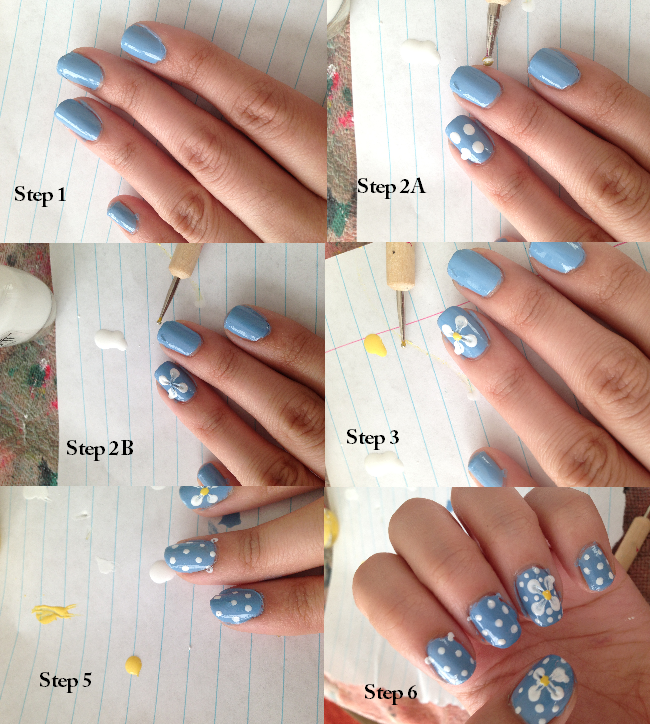
1) First I rubbed cuticle oil on my nails and then added a base coat. Later, I painted two coats of Revlon's Dreamer.
2) Using a large dotting tool, I put four white dots(Sally Hansen's White On) making the shape of a square on my ring finger. These dots will later look like flower petals. I then quickly grabbed my small dotting tool and poked a hole in the middle of one of my dots, and then dragged the dotting tool to the center of the square without lifting the tool into the air. Do this to all of the dots on your ring finger.
3) Now I used Sally Hansen's Mellow Yellow to put a dot in the center of my flower.
4) Repeat Step 2 and 3 onto your thumb nail.
5) Again, I used my white nail polish to dot several small dots around my flower. I then dotted the rest of my nails in a checked pattern(not a checkered design).
6)Add a top coat, clean up your nails around the edges and your done! Quick and simple :)
[caption id="" align="alignleft" width="275"]
Hawaiian Flower[/caption]