


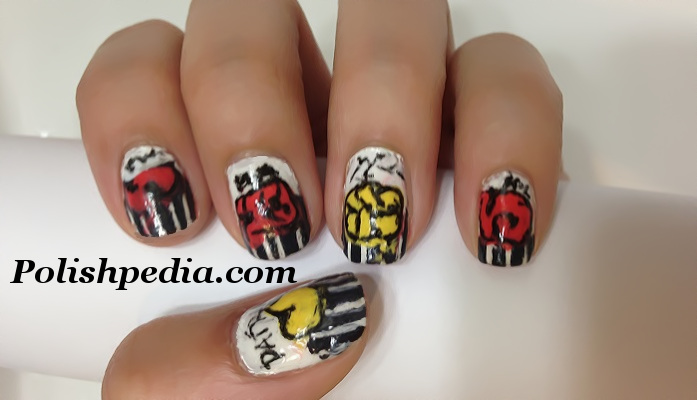
Graffiti Nail Art

Take The First Step!
Do You Have a Passion For Beauty?
"Of course you love anything related to beauty! That is why you are on Polishpedia. Why not take that love to the next level and become a beauty professional?The first step is to talk with some of the best cosmetology schools around the country. I have teamed up with some of the best and they would love to talk to you about what cosmetology can do for you. There is no obligation, just a chance to learn and take an awesome adventure into the world of beauty! ~ Jocelyn
Glitter Nail Art Steps:
1. Rub cuticle oil on your bare nails and then apply a base coat. Now apply two coats of Sally Hansen's White On.2. Apply striping tape vertically. Then paint half of your nails a black color. Just half of your nails.
3. Using Sally Hansen's Black Nail Art Pen(A Dotting Tool would work as well!), I scribbled words above my black stripes. (Graffiti by pen on walls)
4. On my Ring and Thumb fingers, I dropped globs of Sally Hansen's Mellow Yellow and let it dry. I repeated this process on my index, middle, and pinkie fingers except with Revlon's Make Mine Mango.
5. Using the Black Nail Art Pen, I outlined shapes and lines on my globs, giving the illusion of spray painted graffiti.
6. Apply a top coat and you're done! :)

Nail Art By
Products Used
More Nail Art Videos

Copyright © 2026 Polishpedia: Nail Art | Nail Guide | Shellac Nails | Beauty Website. All Rights Reserved.
Privacy Policy
Privacy Policy